The bathroom mirror is an often-overlooked yet essential part of the bathroom. It enhances your bathroom’s harmony, functionality, and appearance. Mirrors come in various forms and patterns, so you can pick one that suits you.
Oval mirrors have become increasingly popular in recent years because of their aesthetic appeal and psychological impact on their viewers. Oval mirrors add a touch of elegance to the space.
However, purchasing an oval mirror is relatively expensive; but it becomes super affordable if you get an unframed mirror and frame it yourself. This post will teach you how to DIY an oval bathroom mirror frame easily with only a few simple materials.
So, without further ado, let’s get started.
How to Frame An Oval Bathroom Mirror?

Oval mirrors are considered most suitable for places that have limited wall space availability. To frame a mirror, people must follow a few basic processes. This article will go over five creative ways to customize your oval bathroom mirror.
1- Framing Mirror with Wood
If you’re a newbie and wondering how to frame an oval bathroom mirror, the most common and simplest option is to use a wooden frame. Wood comes in a variety of eye-catching hues that enhance the overall aesthetic of frameless mirrors. It is available in cherry red, electric red, bronze paint, and many more.
You can easily create an elegant bathroom mirror that seems like an artist made it with the following basic guidelines.
2- Measurement of the Mirror
The first step is to measure the mirror and cut the primed MDF baseboard to match the dimensions. To get the mirror’s precise measurements, it is necessary to determine the proportion of all its angles and sides. It will help determine how much wood you need to build the oval mirror wood frame.
3- Wood Selection
Choosing a type of wood is the next task. It ultimately depends on your preferences and the room’s decor in which you hung the mirror.
Pine is an excellent wood for crafting decorative mirrors for short-term occasions like birthdays and parties. Cedar is the best quality if you intend to use your mirror for an extended period.
Consider using elegant door casing woodwork to give your bathroom a vintage feel. It is more refined and provides your bathroom with a sophisticated appearance.
4- Making a Wooden Frame

Apply the mirror’s measurements to the wood board by drawing out the mirror’s layout with a pen or marker. Oval shapes are more difficult to draw accurately, so you need to be extra attentive. Then, it is time to cut the frame.
Specialized instruments such as a scroll saw, band saw, or jigsaw is required for precise cutting.
5- Painting the Frame
This stage is optional, as various finishes can be applied to the frame. If you’re going to paint the frame, start with the backside of the board. Afterwards, wait for at least 2 hours before attempting the front. And, of course, don’t forget to paint the edges.
6- Sanding the Frame
After the paint dries, sand the whole surface evenly to make it smooth. To avoid damaging the wood, use a fine sandpaper and then wipe it off with a moist cloth to remove any dust or contaminants.
7- Glue the Frame to the Mirror
Next, use strong wood glue to attach all parts to the mirror. When bonding the edges, apply firm pressure. If you want to ensure a solid grip, it’s preferable to let the glue set for at least three hours.
8- Caulking
It’s now time for caulking to fill in the cracks and conceal the edges. Apply putty and silicone to fill in gaps and seal the wood together. To remove any excess caulk, use fine-quality sandpaper. Allow the silicone to dry for at least one hour to perform its job best.
9- Painting the Silicone
For a smooth finish, add two coats of silicon paint to the board. Allow it to dry for at least 12 hours.
10- Apply the Mirror Adhesive
The next step is to attach a mirror to the frame using paneling adhesives.
11- Mount the Mirror Securely
Once you’ve finished building the frame to your requirements, all that’s left is to attach the mirror to it. Place the mirror precisely on the level and press the frame and adhesive firmly into the wall to fix it. Finally, bend the frame’s pins to ensure that the mirror is securely fastened to the wall.
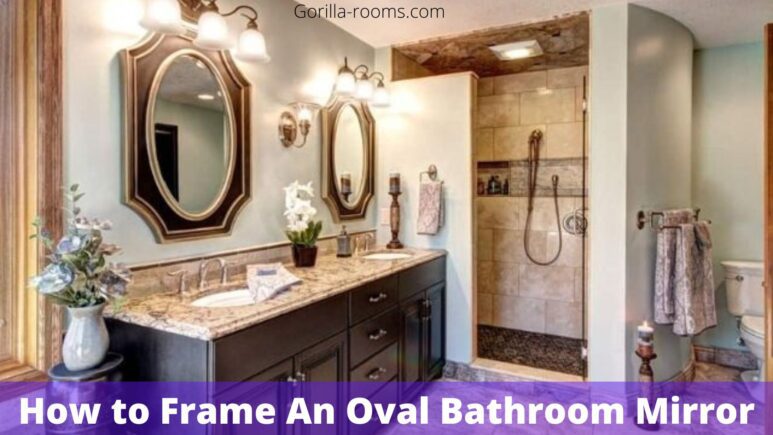
A bathroom mirror with a wooden frame gives the impression of refinement and uniqueness. Ideally, the frame should be paired with other bathroom accessories, such as cabinets. We can create a beautiful and elegant premium bathroom mirror by achieving the ideal balance.
12- Use Mosaic or Tiles to Frame An Oval Mirror
Mosaic tile to frame an oval mirror is one of the best options available. They’re significant for restrooms because they shield the wall from water splashes.
Here is the procedure to follow to achieve the detailed tile pattern with the mirror:
- The first step is to buy a simple mat from a local shop. Then you cut the mat according to the tile’s dimensions. Make sure to leave a few extra inches for the tile’s edges.
- Afterwards, remove the mat’s backing and set a mirror on it.
- After removing the plastic, lightly set the tile on the other side of the mat. After confirming that the tile is in the correct location, it is recommended that the user press the tile firmly against the mat. Once the tile is firmly attached to the mat, you can’t remove it.
- Once you’re sure, press the tile down firmly to secure it.
- Before grouting, apply painter’s tape to the mirror to ensure its safety.
- Finally, begin grouting the tiles with a trowel.
13- Use of Ropes to Frame the Mirror
Another option for making the frameless oval mirror is to use woven or ropes. The entire procedure is simple and inexpensive, but it still looks fantastic.
- To begin the oval mirror transformation, you must first obtain a woven frame from a local craft store.
- Next, you’ll need solid adhesive glue. In this case, we recommend E-6000, which is primarily effective on all materials.
- Using the adhesive, securely adhere the mirror to the woven frame. Keep a small amount of weight on the mirror to help strengthen the joint. Now, let everything dry for 24 hours.
- Finally, use hot glue to adhere to a small piece of ribbon. Create a loop and use adhesive to attach it to the rear of the woven framed mirror.
14- Framing an Oval Mirror with Metal Clips
Metal clip placement gives a robust and stable appearance to a frameless mirror. Because of its affordability and versatility, this framing technique is trendy. One of the most significant advantages of this frame design is that you can apply it to any mirror shape.
Additionally, there are a variety of metal clips on the market that people can use to keep the mirrors in place. Also, the mirror must be fastened to the wall securely to avoid any potential accidents.
You can easily frame the oval mirrors with metal clips by following these instructions:
15- Measurement of a Mirror
The first step is to measure the mirror’s width from the center outward and then mark it. You’ll need a mirror marker that won’t leave a stain and can be easily removed to achieve this.
Using the same marker, draw out the mirror’s measurements on the wall from its center. As a result, you can use the mirror edges to guide your measurements of the clip distances.
16- Place the Mirror on the Wall
Place the mirror in the shape and location you want it to be, then mark where to drill the mounting holes.
17- Securing a Mirror Using Metal Clips
Use a truncheon to tap anchors into the wall until you feel safe and can bear the mirror’s weight. To secure the mirror in the desired position, tighten the semi-presential screws. When you’re sure they’re in the right place, tighten them.
Ensure that the mirror’s upper and lower clips are in place before being in their final position.
18- Framing the Mirror with Beaded Glass
A beaded glass framed mirror will look trendy and sophisticated whether placed in a room or a bathroom. It is one of the most renowned DIY oval mirror frame ideas.
- To begin, a decorator must set the mirror on the backing. A marker would be required to trace the outline of the mirror.
- After that, a decorator must cut the vinyl along the designated line.
- He’ll need to cut a piece of vinyl about 2 to 5 inches long for the hanger. Glue the pieces back together once they’ve been folded. If he doesn’t want to use adhesive, he can try sewing.
- Ensure the vinyl backing is attached to the hanger by stitching or applying glue.
- A caulking gun is the best way to apply mirror glue to the mirror’s back. Spread the glue evenly across the surface and remove any air bubbles. Now, firmly press the vinyl onto the glue and let it dry for a few hours.
- Add a glass gem to the oval mirror to give it a new look. Apply a small amount of super glue to the mirror’s edge, then push the stones into place. Repeat the process once you’ve covered the entire border with glass jewels.
- Allow the entire project to set for 24 hours before assembling the beaded glass framed mirror.
Related Posts: Tips to Unlock Bathroom Door Push Button Lock
How to Hang an Oval Bathroom Mirror?
Hanging a mirror on the wall is a relatively simple process, although it does necessitate a certain degree of attention. Mirrors with oval frames, in particular, are more prone to falling if not installed correctly.
For a secure installation of an oval mirror with metal clips in a bathroom, follow these steps:
- The first step is to place the mirror on the wall.
- The second step is to trace the mirror with a pencil very lightly. Set the mirror aside.
- Install the mirror clips at the bottom and on both sides of the oval, making sure they are anchored. Screws should not be tightened at this stage. Remove the pencil marks from the wall.
- Install the fourth clip at the top of the oval, which is already attached to the mirror clips on the wall.
- Next, have your assistant hold the mirror while you tighten screws and check that the mirror clips are properly keeping it in place.
Tip: You can add more clips to the bottom curves for heavier mirrors. To prevent the mirror from falling, have someone keep it on the wall at all times until it is properly hung.
If you have a wooden frame, it can be hung in any area where nails can be inserted. Because metal clip frames are permanently attached to the wall, you must determine the best location for them to be hung while complementing the bathroom decorations.
Conclusion
People who want to decorate their bathrooms often wonder how to frame an oval bathroom mirror. That’s why we’ve compiled a list of design ideas that will help you master the art of framing.
Framing an oval bathroom mirror adds the finishing touch to bathroom decor. It brings balance and peace to the space by highlighting its items.
We hope you learned something new about framing an oval mirror from this article. Please let us know if you have any further suggestions in the comment section below.
Thank you.
Frequently Asked Questions (FAQs)
How can I make my bathroom mirror look better?
The best way to improve the look of a mirror is to frame it. The choice of frame is purely a matter of taste. Wooden frames, mosaics, tiles, and woven materials are all options. In addition, staining the frame in a sleek and contemporary color will give the piece a quality look.
How do I frame an existing bathroom mirror?
Sometimes we have mirrors in our bathrooms that don’t have a frame or that we don’t like. If this is the case, there is a technique to attach frames for bathroom mirrors, available in various materials, including wood, ropes, and beads.u003cbru003eu003cbru003eThe basic concept is to create a classic image with a frame that matches the rest of the bathroom decor.u003cbru003eu003cbru003eBesides wooden frames, you can utilize materials to build a mosaic-like frame. It gives the impression that the mirror is part of the wall, creating a balance between them.
What is the ideal size for a mirror in a bathroom?
To choose the right bathroom mirror, a decorator must first measure the width of the countertop. Then select a mirror that is one or two inches shorter than that measurement.


