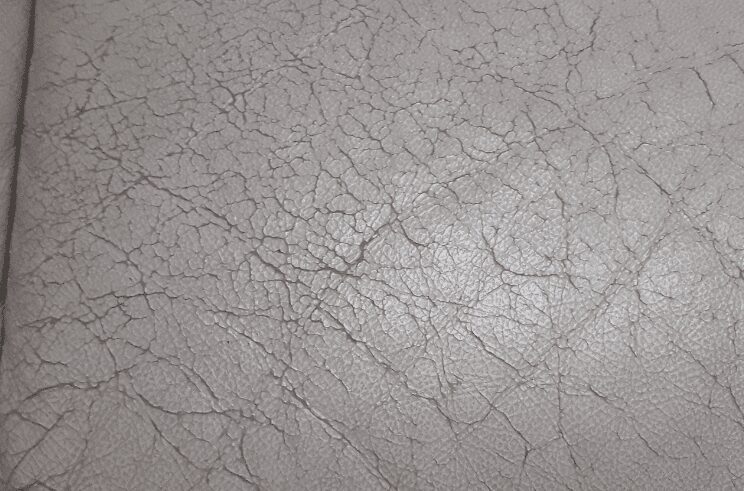
The leather sofa cracks when it dries out or when it is exposed to the sunlight. The abrasion occurring between the fibres of leather can lead to a cracky surface.
Cracks can be hidden if the leather is properly rehydrated with a good conditioner, even though the damage is permanent. For deeper cracks, fill them in or dye them to blend them into the leather’s colour.
It is possible to rejuvenate a precious leather item with the right treatment. In this article, we have discussed the step-by-step guide that you can use to remove cracks from your couch.
So let’s jump into it.
Related Posts:
- Best Leather Color Restorer
- Best Slipcovers For Leather Couches
- Why Is My Leather Couch Sticky?
Why Does Leather Couch Crack?
Before we get into the solution of couch cracking, we must acquire knowledge about leather couch cracking to prevent leather cracking in the future.
Like other natural materials, leather can also get damaged and worn over time—also, the microscopic changes in the material cause leather to crack.
Numerous interwoven fibres make up leather, some compact near the surface and some looser toward the depths. Eventually, the fibres will dry out and cause abrasion and wear.
For Example, Your skin needs nourishment like oil and water, and you also know that the lack of nourishment can cause dry and rough patches in your skin.
Like your skin, leather also needs to be moisturized. If you forget to moisturize your skin for a long time, your skin will start getting damaged.
Thus, moisture loss causes the packed fibres to rub against one another whenever it flexes in leather. This causes cracks at tension points over time as the fibres get stiff and tight.
How To Fix Light Leather Cracks
The first thing you should always do is apply a strong leather conditioner to strengthen the fibres around the cracks and blend them with the rest of the leather.
On dried-out leather, the effects can be quite dramatic; a scratch or small crack can be made to look as if it was naturally occurring.
Things You Need For This Method
- The best conditioner or cream
- Brush and cloth made of soft, dry fibre
- Brush with a fine bristle
- Mild soap
- Spoon
Procedure
1. Clean Your Leather Couch
You should test the cleaner or soap on a small patch first. Use a soft, dry cloth or brush to clean the top surface of the cracks and the leather surrounding them.
Then, use a small, fine-bristled brush and mild soap to clean the cracks more thoroughly. The goal is to get the leather soft and flexible.
2. Smooth it out
Once you’ve tested it on a small patch, apply the conditioner or oil to the crack. Use your finger, sponge, or back of a spoon to smooth the crack. Continue to do this until the crack is visibly less pronounced or deep.
Let the leather naturally dry after wiping off the excess product. Let the leather dry completely, preferably overnight, so it can absorb the conditioner and rehydrate.
3. Repeat if required
You may have to repeat the application if the leather seems too dry. It is important not to over-oil leather because this can collapse the structure, making it appear waxy and slippery.
Reapply leather conditioner every month for best results. It should prevent further drying and crack of the product.
How To Repair Deep Leather Couch Cracks
If your leather is brittle and has deep cracks, then using a conditioner is unlikely to work as it would simply absorb into the leather.
But all is not lost; with a little more elbow grease, there’s a good chance you can restore cracked leather to its former glory.
Method 1: Using leather crack filler
Things You Need In This Method
- Leather cleaner or soap
- Sponge or cloth
- Sandpaper with a 600-grit rating
- Leather filler of high quality
- The palette knife
Procedure
1. Clean
If any dirt remains on the leather, wash it off with a cloth or sponge dipped in soap. Ensure you test the cleaner first on a small area, then mix the soap with water.
2. Wait Overnight
It is important not to let the leather get wet since moisture will prevent the filler from settling in the cracks. To ensure faster drying, wipe off any moisture with a dry cloth.
3. Smooth
Apply gentle pressure to the cracks as you wear them down with super-fine sandpaper. Once you’ve reached a finish that looks smooth, then stop.
Using a dry cloth, wipe any dust off.
Tip: Avoid coarser, harsher sandpaper as it will leave scratches.
4. Apply leather filler
Apply the filler with a palette knife, then fill in the cracks with the paste by brushing it in. Until it appears that the crack is filled, apply more.
5. Remove the excess paste with the knife.
By tilting the palette knife sideways, you can gently scrape off the excess paste. Repeat this process until you no longer see any overspill.
6. Let the leather dry for six hours.
To ensure solidification, this step must be taken. The leather will dry faster in a properly ventilated room or the open air.
It is, however, important to avoid direct sunlight and direct heat as these factors can further dry out the leather. A further layer may be necessary as the filler dries.
Method 2: Blending cracks with leather dye
Things You Need In This Method
- Leather cleaner or soap
- Sponge or cloth
- Sandpaper with a 600-grit rating
- Filler of good quality for leather
- The palette knife
- Dye for leather
- Applicator pads or sponges that fasten colour
- The hairdryer
- Sealer for leather
Procedure
1. Prepare the surface with filler
Apply leather filler, if necessary, by following the steps above. Allow the treatment to dry.
2. Sand And Smooth
The leather must be sanded and wiped clean before dyeing. Rubbing gently along the leather’s grain will make it smooth. Remove any dirt and dust that may interfere with the absorption of the colouring.
3. Apply The Dye
Pick a leather dye that closely matches the colour of your item. With a colour-fast sponge or applicator pad, apply a thin coat of dye over the cracks. Make sure the dye is evenly distributed throughout the cracks.
4. Let It Dry
To prevent the leather from drying out, blow a hairdryer back and forth along the cracks for two minutes to let the dye dry.
5. Blend The Cracks
If necessary, apply several coats of dye to the cracks. Up to five treatments may be necessary, depending on the severity of the crack.
Every time you apply the dye, rub the crack’s surrounding area to blend it in. Whenever you dye, use a hairdryer to dry it.
6. Finish The Deal
Sealing cracks with leather sealer protects and conditions the dye. Apply the sealer directly to the sponge and rub it into the dyed area once more if necessary.
In this way, further damage and stains should be prevented. Make sure that the hairdryer is moving back and forth over the crack as you cure the sealant.
How To Prevent Leather Sofa From Cracking

Keep It Clean
Leather is a naturally porous material, absorbs liquid substances very easily. To protect the porous material, leather nowadays comes with a protective coating.
It also enhances its ability to withstand daily use (from sippy cups, dirty paws, and holiday parties).
When leather is clean, its colour and texture are less prone to change. Leather should be cleaned regularly to prevent dirt from collecting.
Our recommendation is to clean leather three or four times a year using a gentle leather cleaning solution. Cleaning solutions such as these attract debris from leather’s surface and make it easy to wipe it away.
Add Moisture
Adding moisture is the key to getting the crack-free leather sofa. Adding moisture to your sofa can prevent it from cracking and also, adding moisture can also give you a smooth and shiny surface.
We recommend you apply moisture after one year of purchasing because, after one year, leather needs its first moisture treatment.
It’s just like human skin. As human skin gets rashes and dry patches without moisturizing similarly, leather sofas also need moisturizing. Without moisturizing, the leather will start cracking and fading.
Moreover, if you want to repair or refill the cracks in your leather sofa, whether lighter or deeper, you can repair them using the above methods discussed in this article
Related Posts:
Best Slipcovers For Leather Couch

